
DIY Solar at Home: How I Did It
It's cheaper and easier than I ever expected

💡 Remember you can get free copies of my books here.
I really wanted to add solar energy to our house, but we weren’t going to sacrifice the rooftop terrace. A few months in, we now have about 3kWp of solar installed. This is how I did it.
Spoiler: the new solar sets can just be plugged into a power socket.
Important context
I am in the Netherlands:
if I say something is allowed, I mean it’s allowed in the Netherlands
if I say something is safe, I mean it’s safe on the Dutch grid
my yield calculations use Dutch sun hours and seasons
I live in a house we own, but much of this works in rentals too
For my Dutchies: doe dit. Het is extreem makkelijk en scheelt meteen in je energieverbruik.
Context 1: Solar is simpler than you think
To add solar energy to your house (bought or rental, doesn’t matter), you need three things:
Solar panels (those make the power)
An inverter (this changes the solar voltage to grid voltage)
A power socket you plug the inverter into
There are some caveats and gotchas, but this is basically it.
In a traditional setup, you pay someone to put panels on your roof, then add a big inverter box, and they will lay cable to your utility closet to link the inverter to your house.
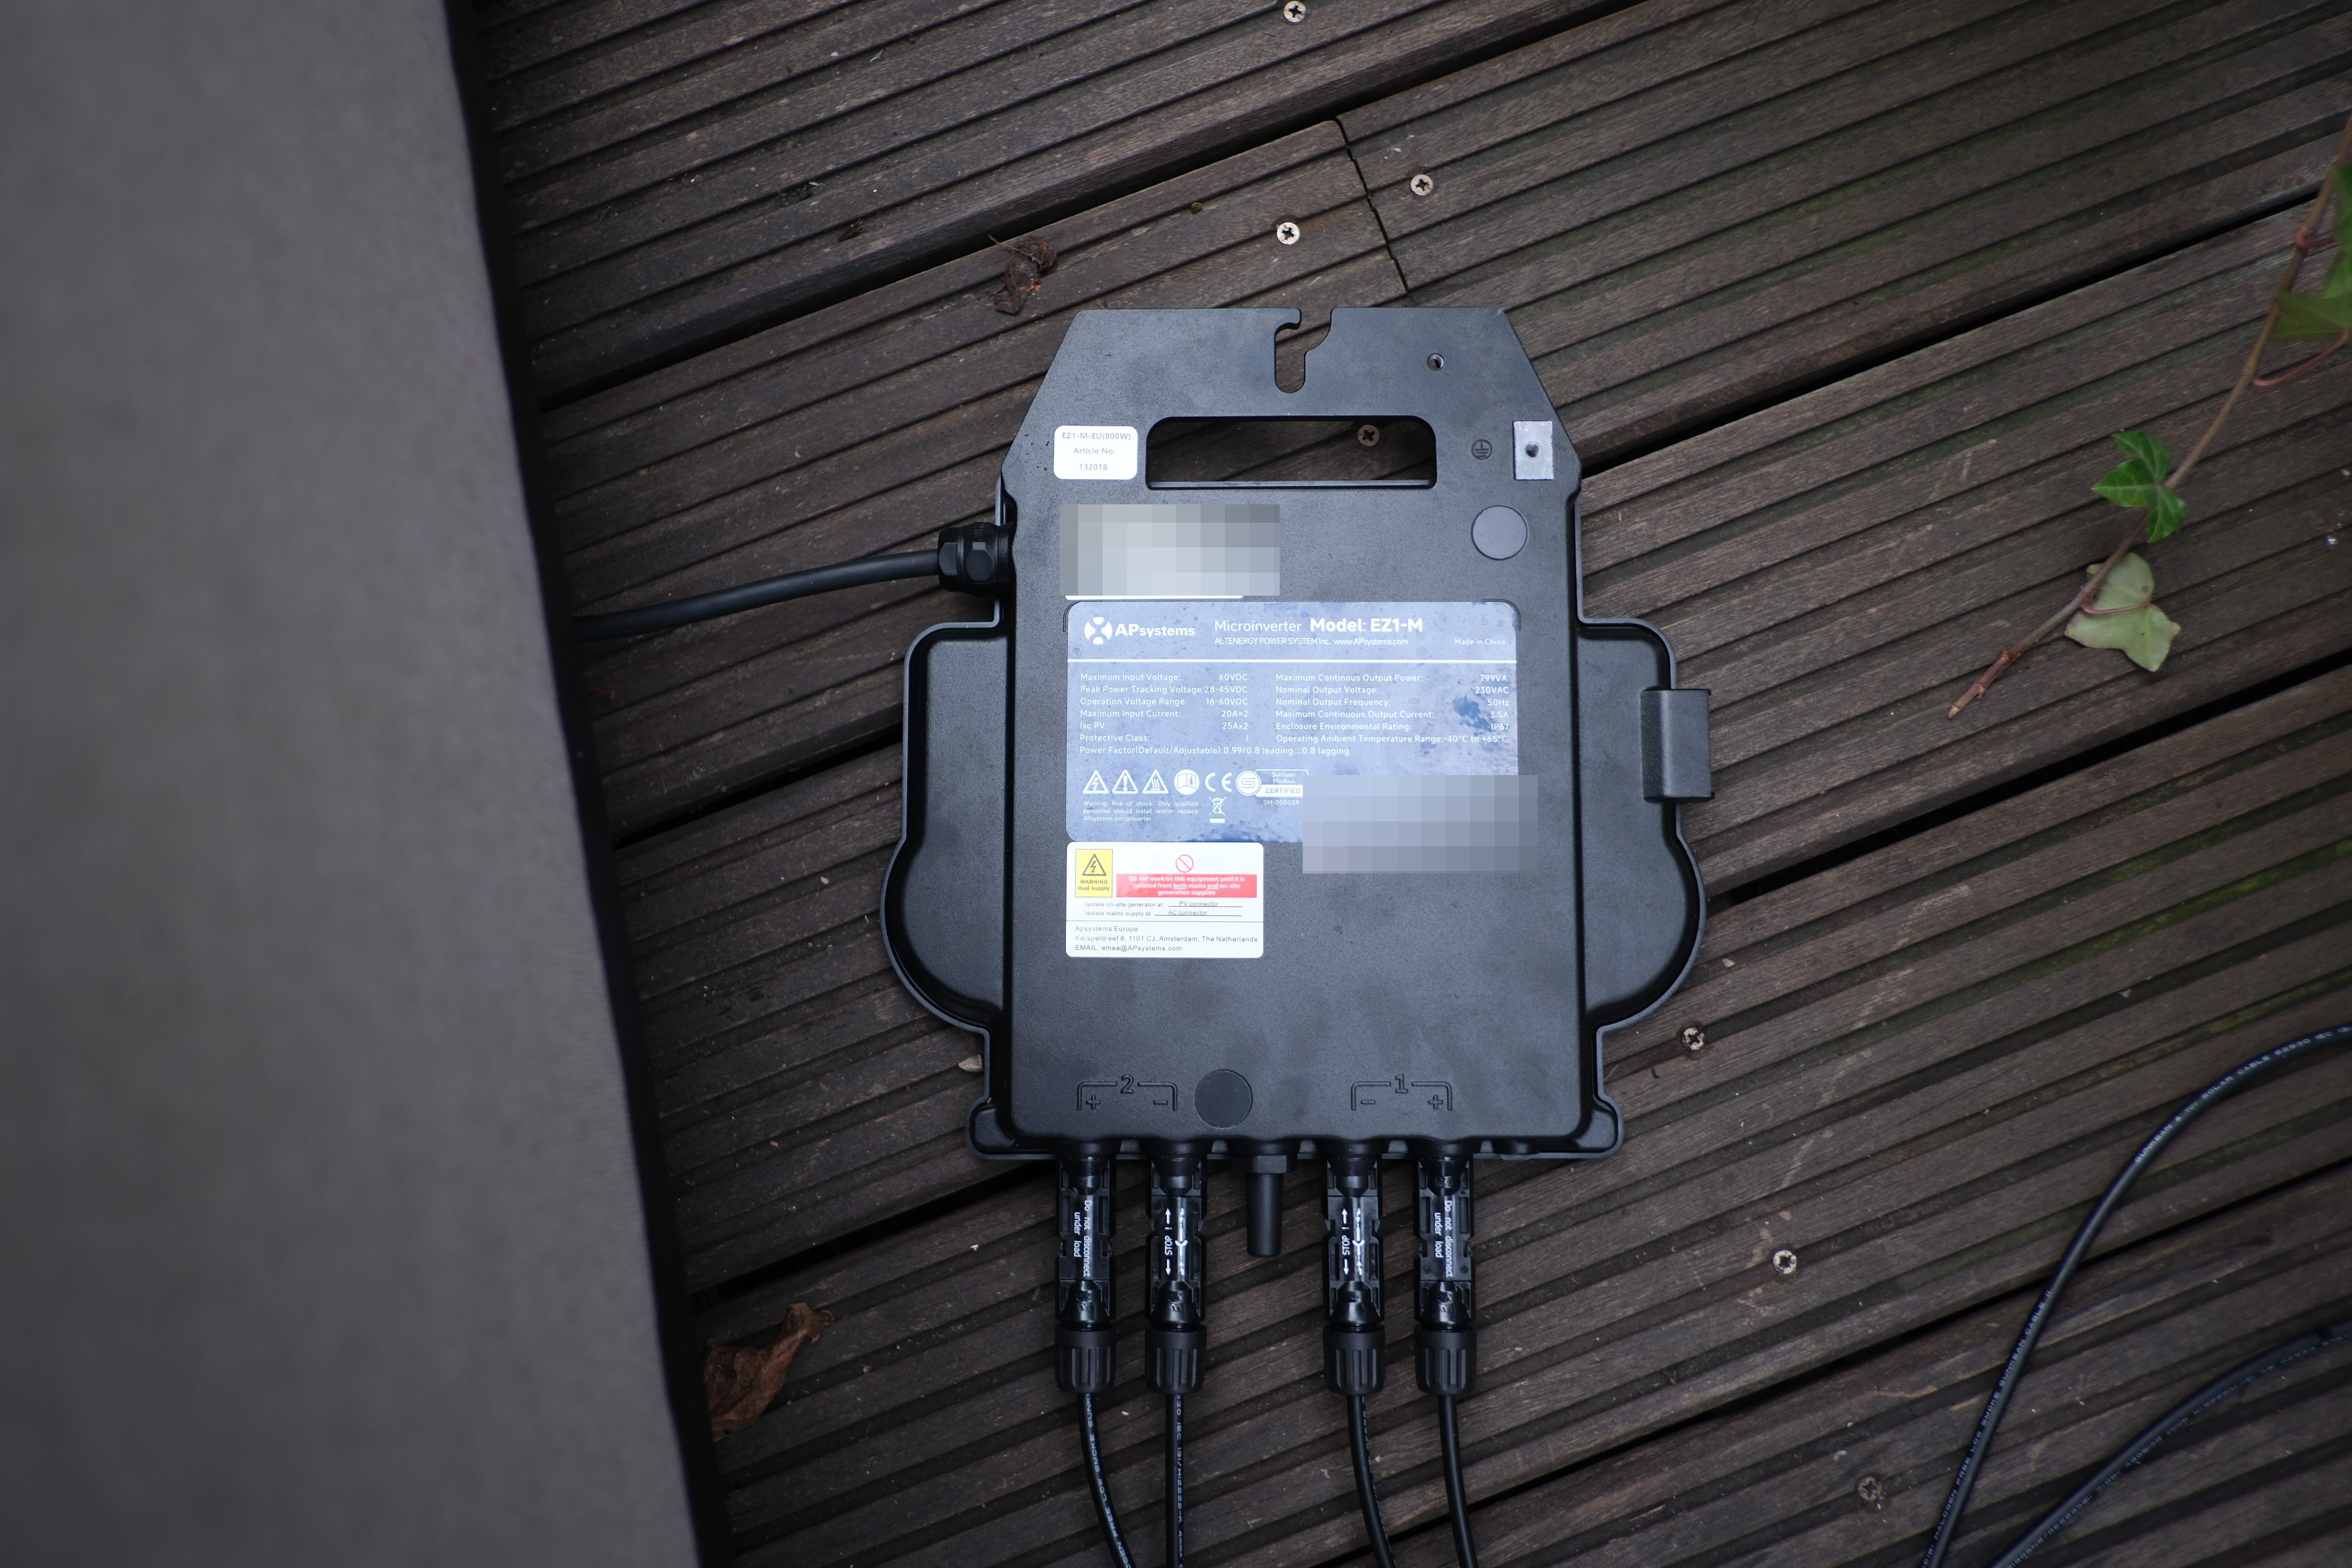
In 2025, you can buy micro inverters. This means that the inverter box is relatively low power and can be plugged straight into a power socket. No electrician needed. There is a limit to the amount of panels you can plug into a power socket for safety reasons, but we’ll cover that later.
If you have a power socket on the outside of the house, the hardest part of installing solar is putting the panels down and adding ballast or using zipties to attach them (that’s not as crazy at it sounds).
You don’t need a permit for this. You just need to tell the grid provider on a super easy website.
Context 2: solar is cheaper than you think
Solar used to be expensive. Now it is cheap. The ROI time of a full solar set (panels, inverter, etc) is 2-3 years.

A rule of thumb, in the Netherlands 1 Watt of solar capacity generates about 1 kWh of power in a year. So a 400 Watt panel creates about 400 kWh a year. That is about 400 * €0.3 = €120 of electricity cost saved per panel.
The cheapest 400 Watt panel on my local solar outlet webshop costs €47.
That means the panel itself takes about 6 months to pay itself back.
DO YOU UNDERSTAND HOW CRAZY THAT IS?!
I mean sure, you still need the micro inverter (which costs quite a bit), and that rule of thumb is quite optimistic. Which is why I calculate a 2-3 year ROI time.
After that?
Free power baby.
What I did: two sets
I had two spots that were potentially solar friendly:
a little roof space above my kitchen (sized like a queen sized bed approximately)
the fence around my rooftop terrace (approx 5 by 5 meters)
I started with the flat roof above my kitchen. Because I knew I wanted to add quite a bit of solar, I asked an electrician to pull a new cable from my utility closet to the roof. Having the panels on a dedicated group means I can go up to approximately 3500 Watts of power1.
Installation 1: 2x 400Wp for €400
The Dutch company Simply Solar B.V. makes both ready-made and DIY kits for home solar. I bought this DIY set. The manual pdf indicated that I needed a certain amount of ballast, so a trip to the local hardware store added about €100 to the price in basic weighted tiles.
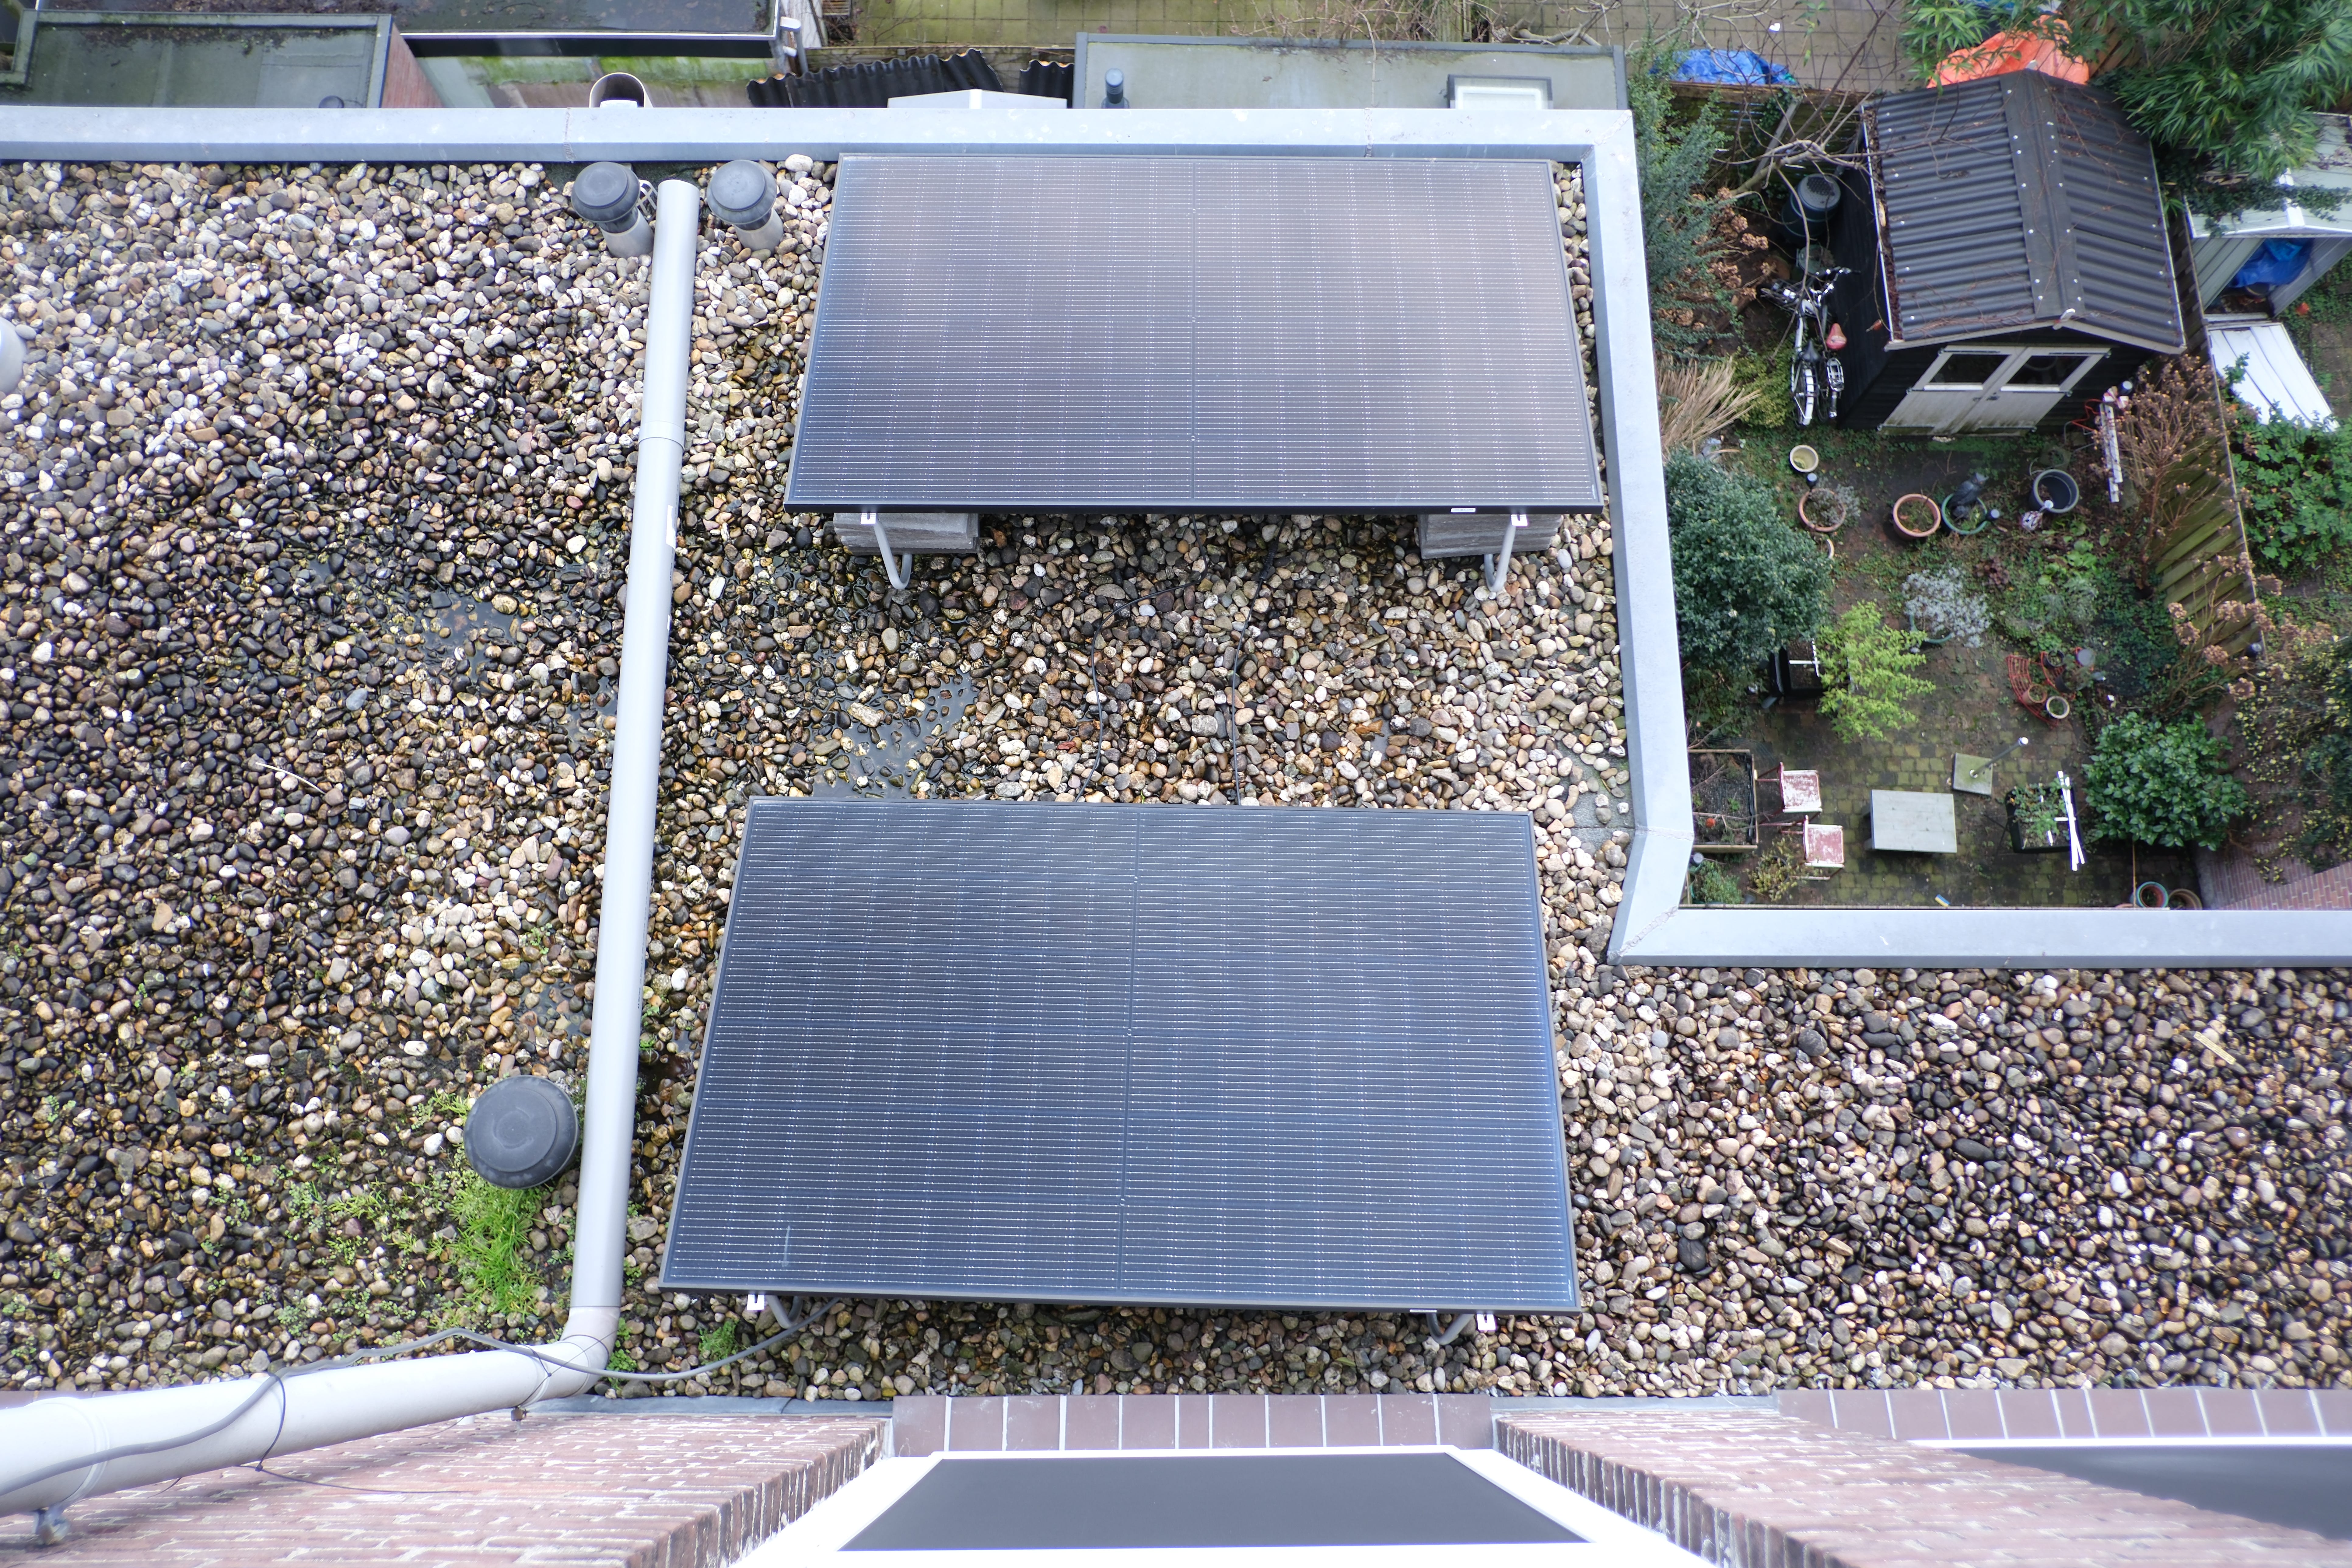
The hardest part of this installation was carrying the ballast up the stairs.
The installation itself was simple:
The panels come with metal legs that you screw into them
The metal legs come with rubber tiles that you place the panel on
The panels have an MC4 connector, which is as simple as plugging in a USB cable
The micro inverter has plugs for the MC4 cables
The inverter also comes with a cable that you plug into the inverter in one end, and a power socket in the other
I literally plugged the device in, and it immediately started providing solar to the house.
The micro inverter comes with an app, which allows you to monitor it. And for my fellow nerds, you can enable the local API so it ties into home assistant without a cloud connection.
Installation 2: 2400Wp flexible lightweight panels for €2400
This was my favorite part. I had called multiple solar installation companies asking if they would add solar panels to the outside of the fence of my rooftop balcony. They all told me they wouldn’t do it, and that “it would be inefficient anyway”.
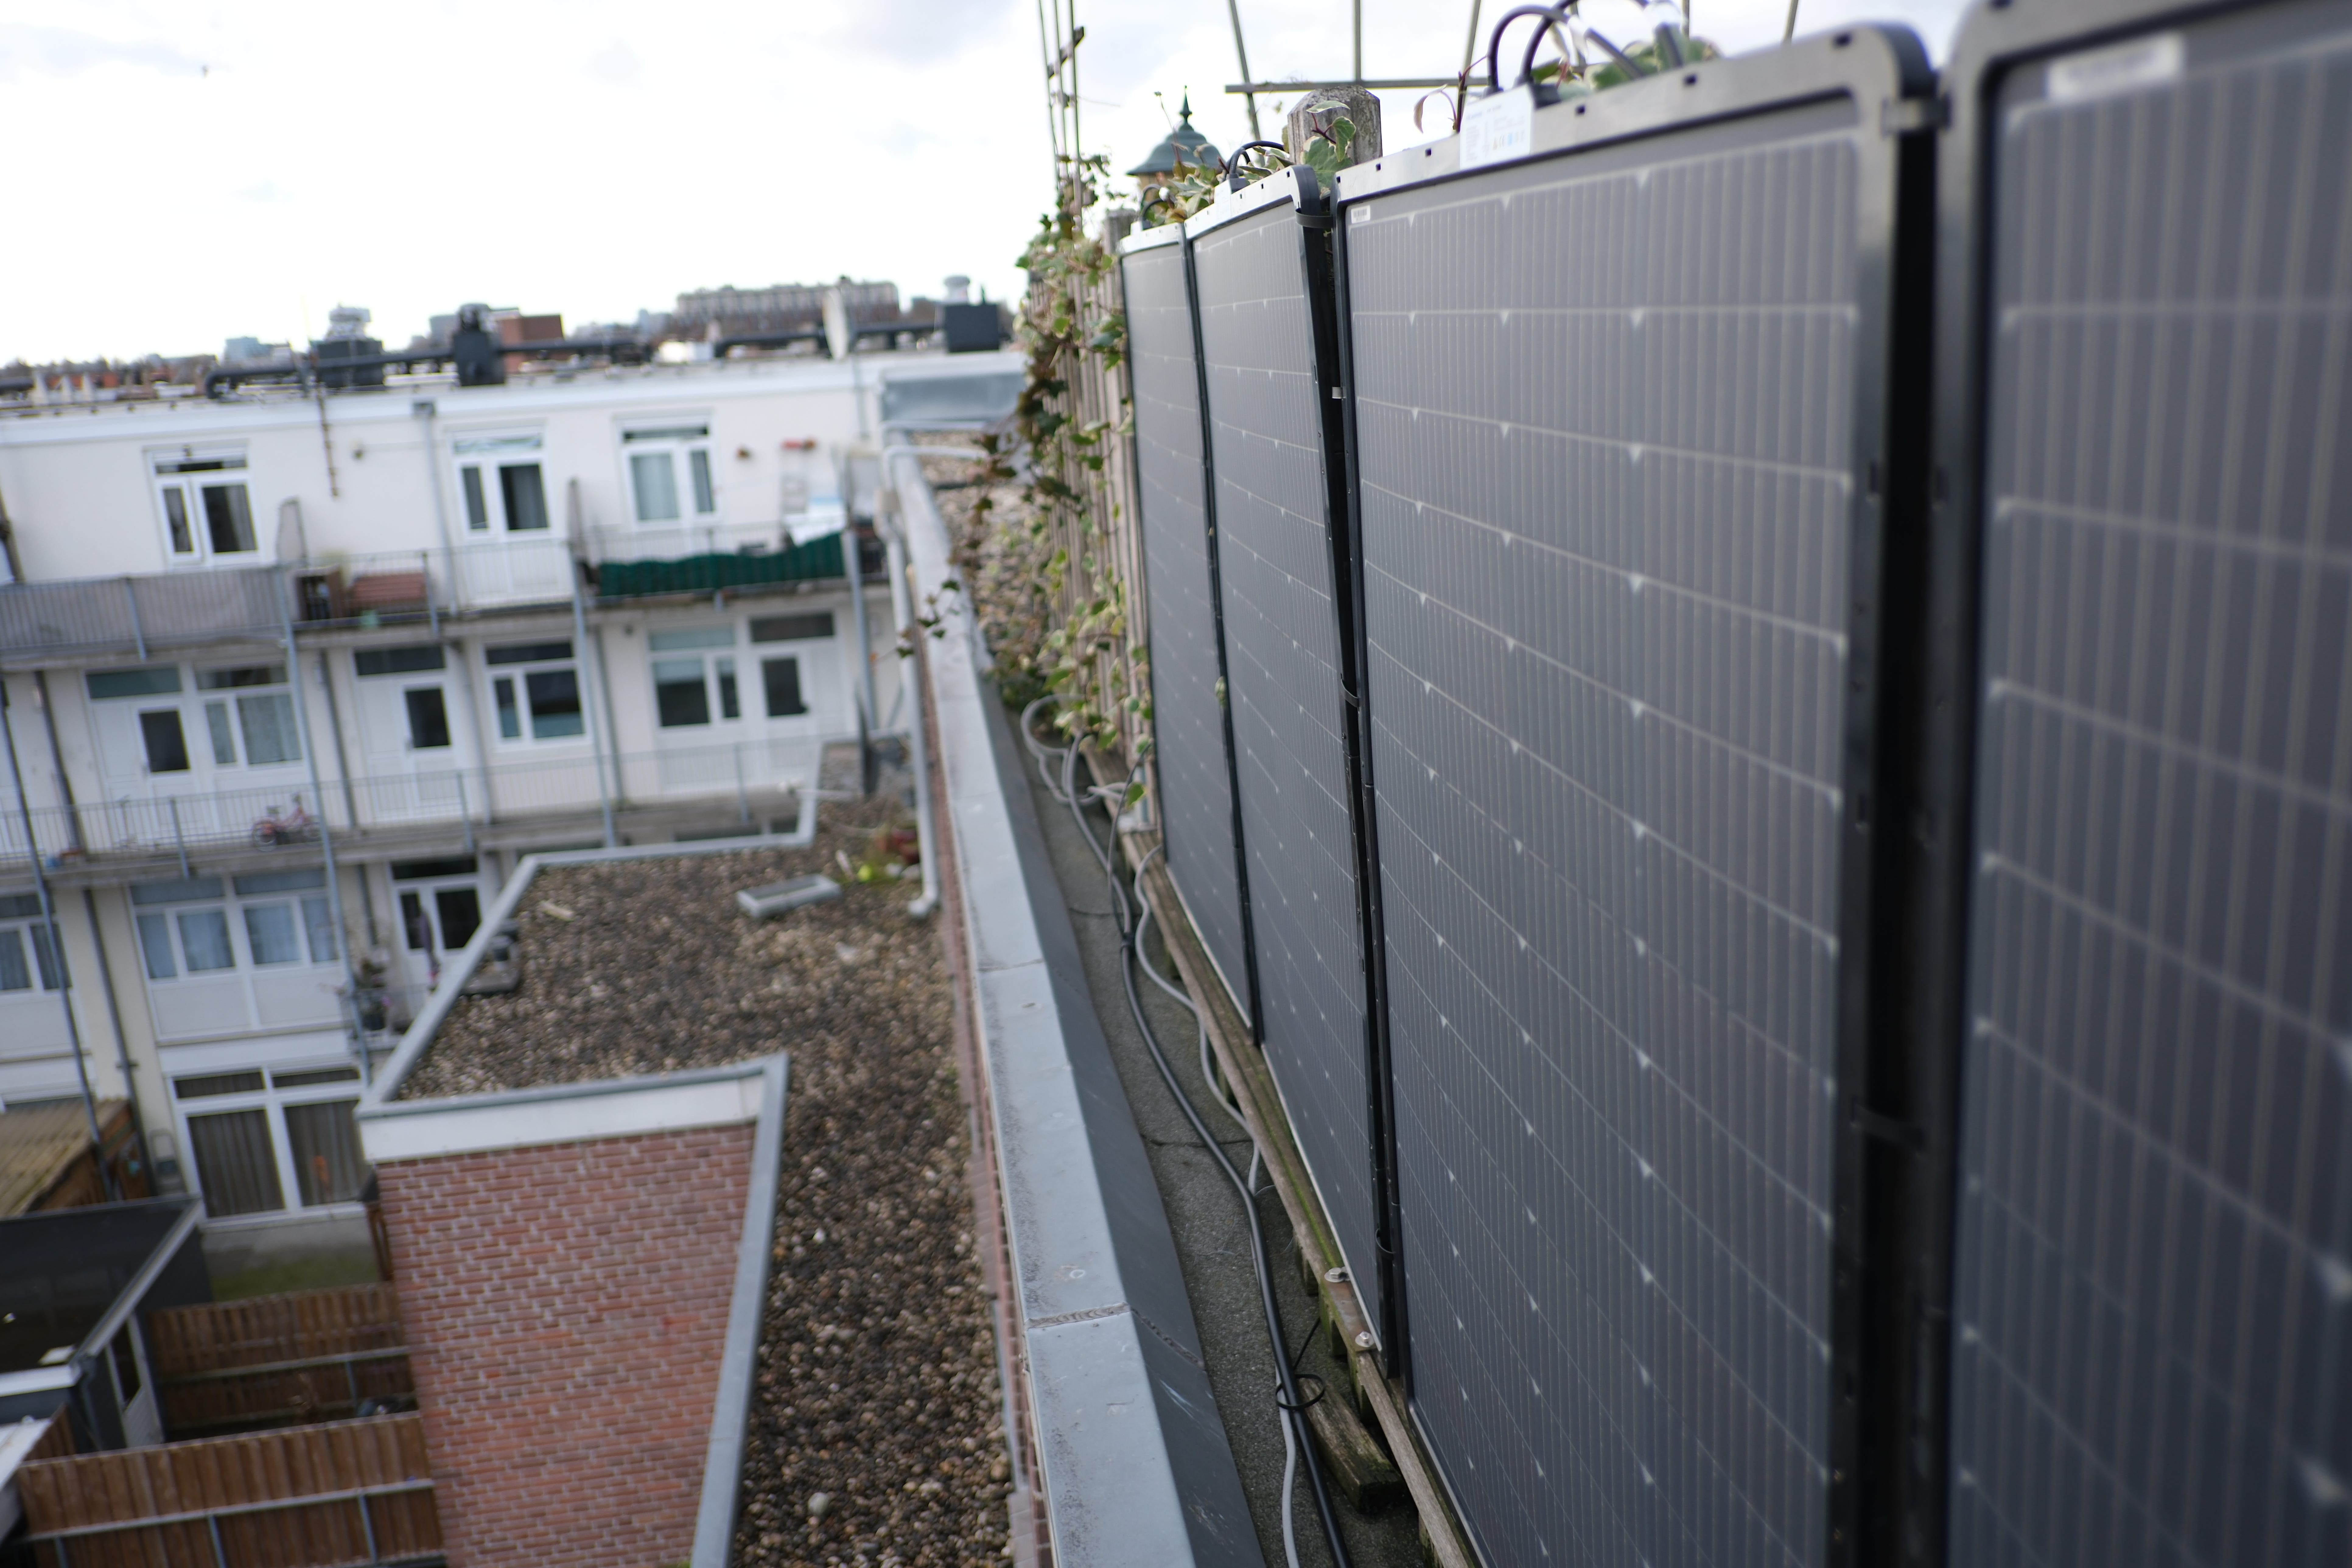
They are right that solar panels yield the best results when angled towards the midday sun. But that wasn’t an option for me. And more importantly: even if it would reduce yields by 20-50%, that would mean that the panels would take 3-6 years to pay themselves back rather than 2-3. Still an epic investment.
The same solar company as above offers a set of flexible panels, meaning that they are lightweight plastic panels that instead of a rigid frame and glass covering have semi-rigid plastic frames with a bendable plastic covering.
They are attached with — drumrols — metal zipties.
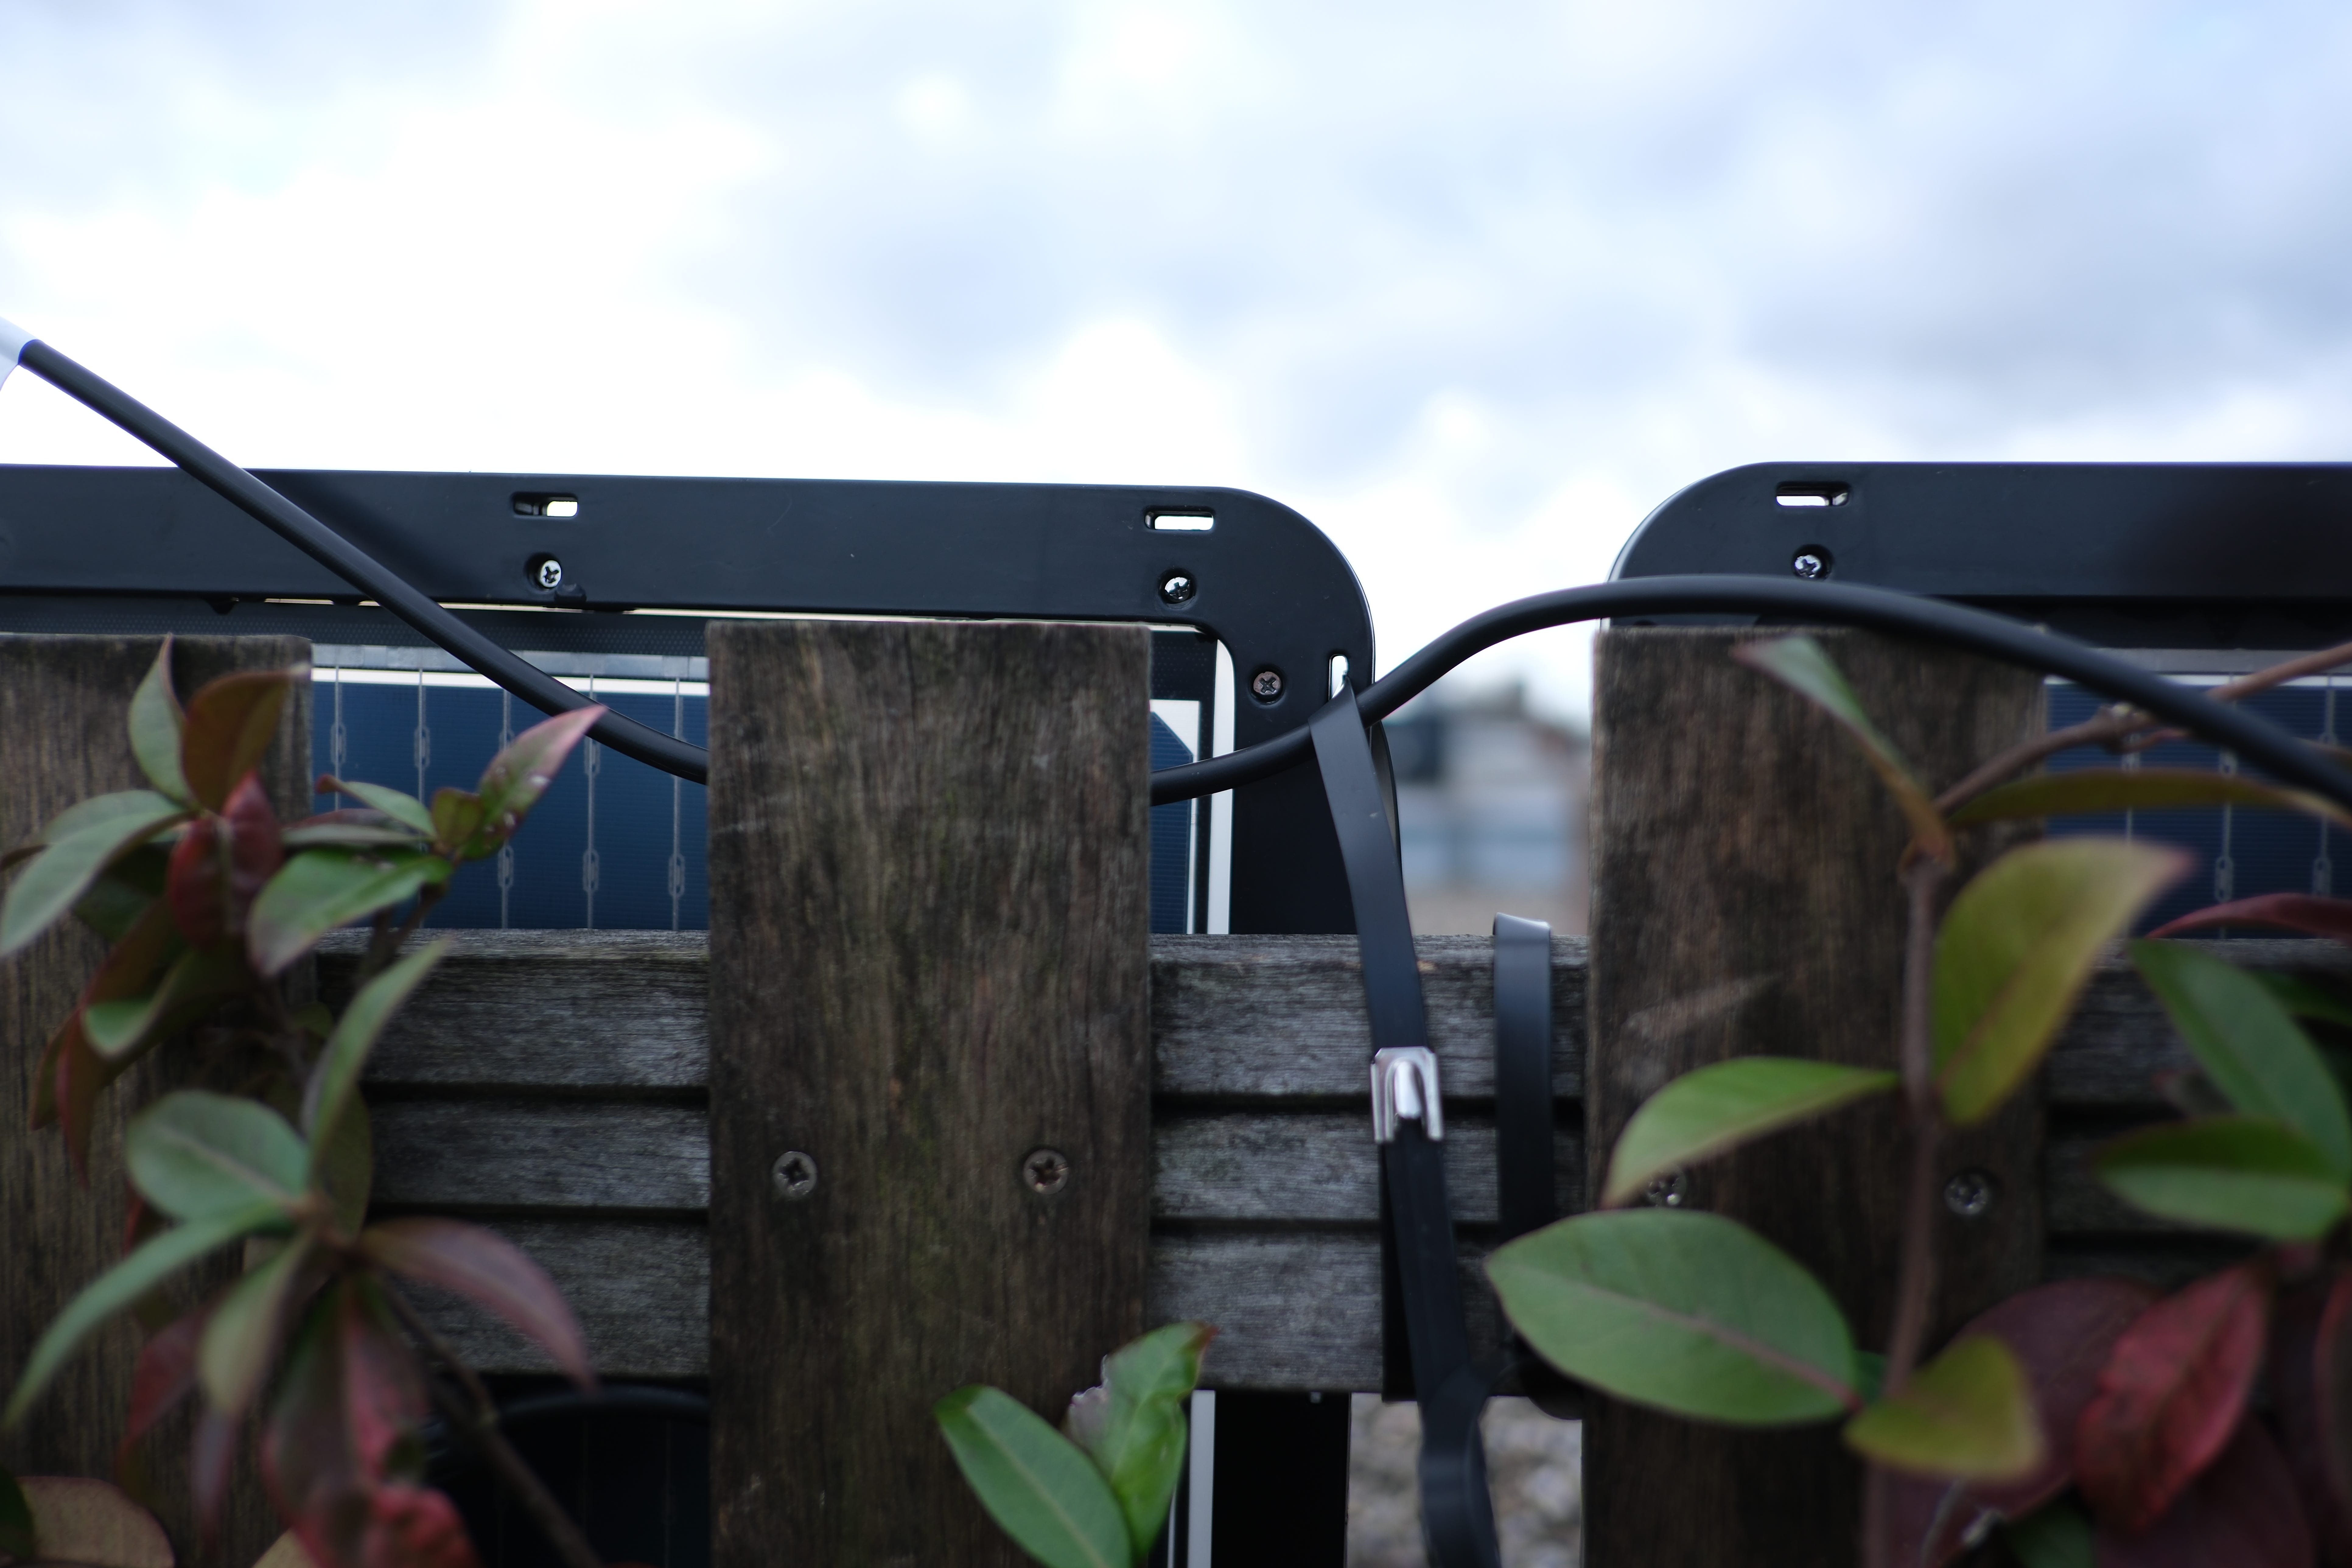
The plastic frames have these little slits, and the set comes with a bag of thick metal zipties that you can use to attach them to anything you like.
The inverter they come with is the same as the above, so installing is as simple as:
Ziptie the panels to the fence
Plug the cables into the inverter
Plug the inverter into the house
And that’s it.
For me that was not all of course, because I put so much power up there. For cable management reasons I again cut the ends of the power cables and combined them in a waterproof combiner box.
Nerd corner: home assistant
If you are a nerd like me, you like pretty chart and needlessly detailed data. If you use the open source smart home system Home Assistant, you can add your data to your local server and get beautiful data like how much you produce and consume:

And if you use smart plugs, you can split that by device too:

Note that these are old screenshots from when I had only the 800W solar set. I have since added the extra panels, and a bunch of smart plugs to keep track of the untracked consumption.
If you want to get data like this, I recommend getting a Home Wizard wireless P1 meter which reads out your electricity and gas usage from the utility closet.
If you have any questions, let me know. I’d love to help you get set up.
💡 Remember you can get free copies of my books here.
Dutch houses tend to have 16 Ampere power breakers, and our grid runs on 230 Volts (with a fluctuation bandwidth of +10% and -6%)
Fabulous post Mentor! I had no idea you could plug in an inverter to a normal socket, that's shocking. Do you have an idea how to find out if that's possible in other countries as well?
Epic! In this setup you don’t provide power to the grid and don’t get bill discounts if you do so right? You only reduce your own consumption from the grid. Is that right?